Product Guides
Bead Lock Mounting Instructions
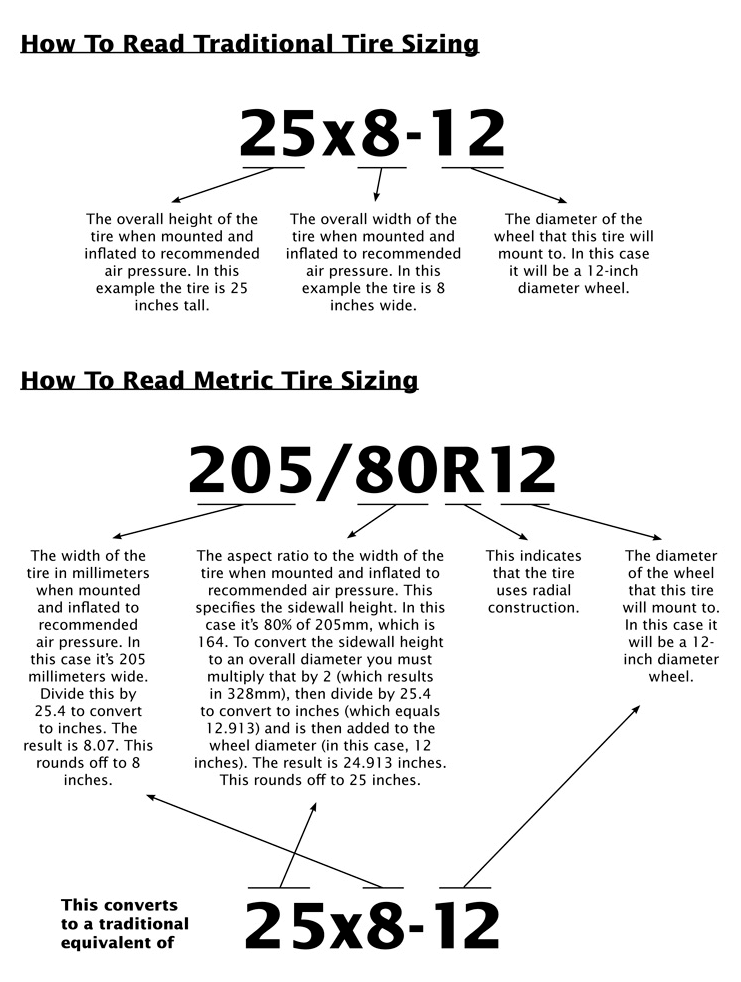
How To Read Traditional Tire Sizes
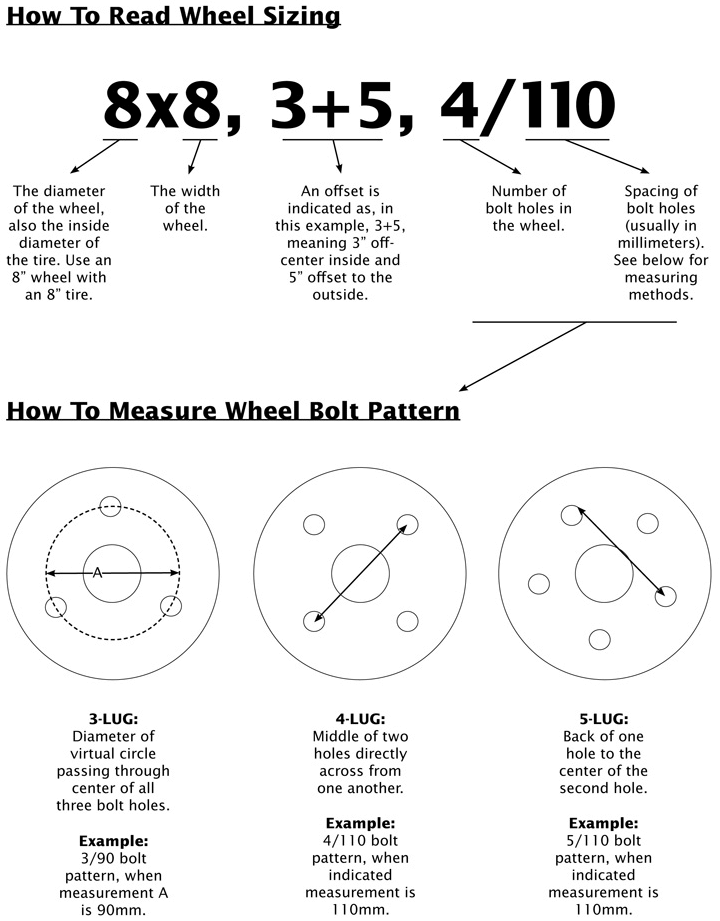
How To Read Wheel Sizing
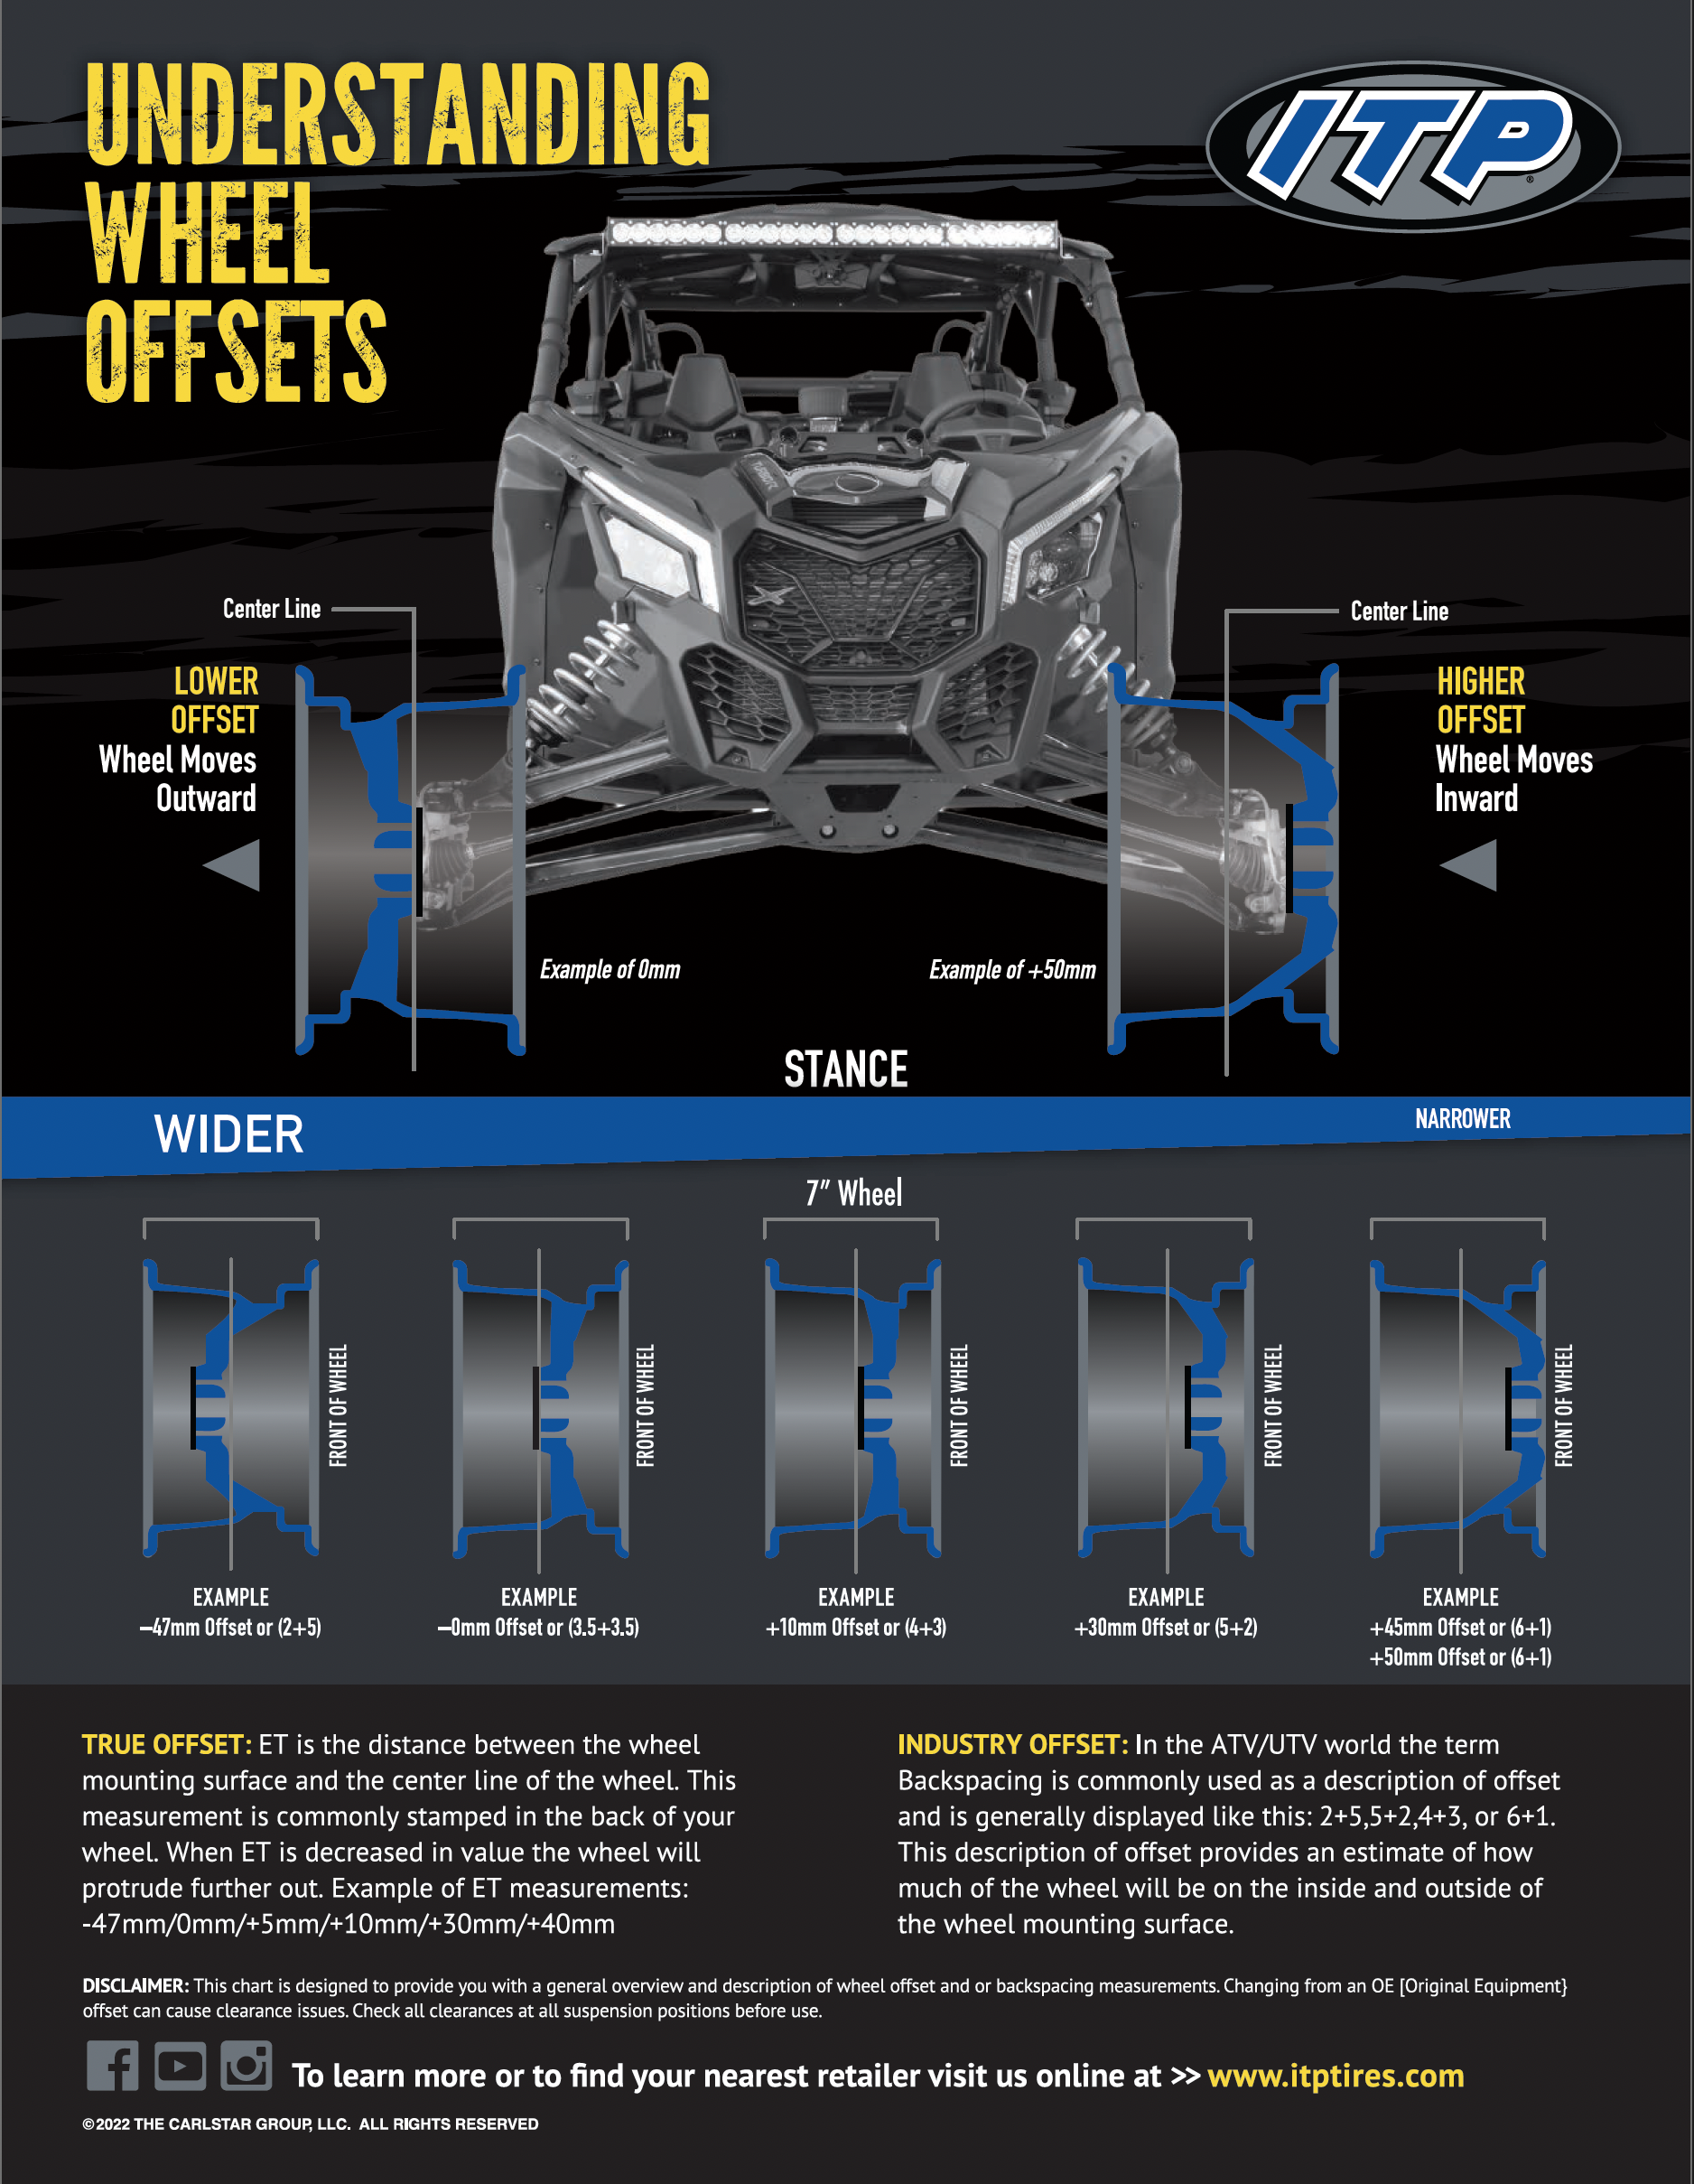
How To Read Wheel Offsets